Front & Back T-Shirt Mockups for Etsy & POD Sellers
A lot of the best-selling shirt designs on Etsy aren't front-only. A small logo on the chest with the main artwork across the back, a punchline on the front and the setup on the back, or a back-only print that only shows once someone turns around — these are some of the most common listing patterns in print-on-demand, and until now our t-shirt tool could only show one side.
That's changed. The T-Shirt product now has a Side toggle — Front and Back — so you can generate a mockup showing your design printed on the chest or on the upper back, from the same tool, same account, same credits.
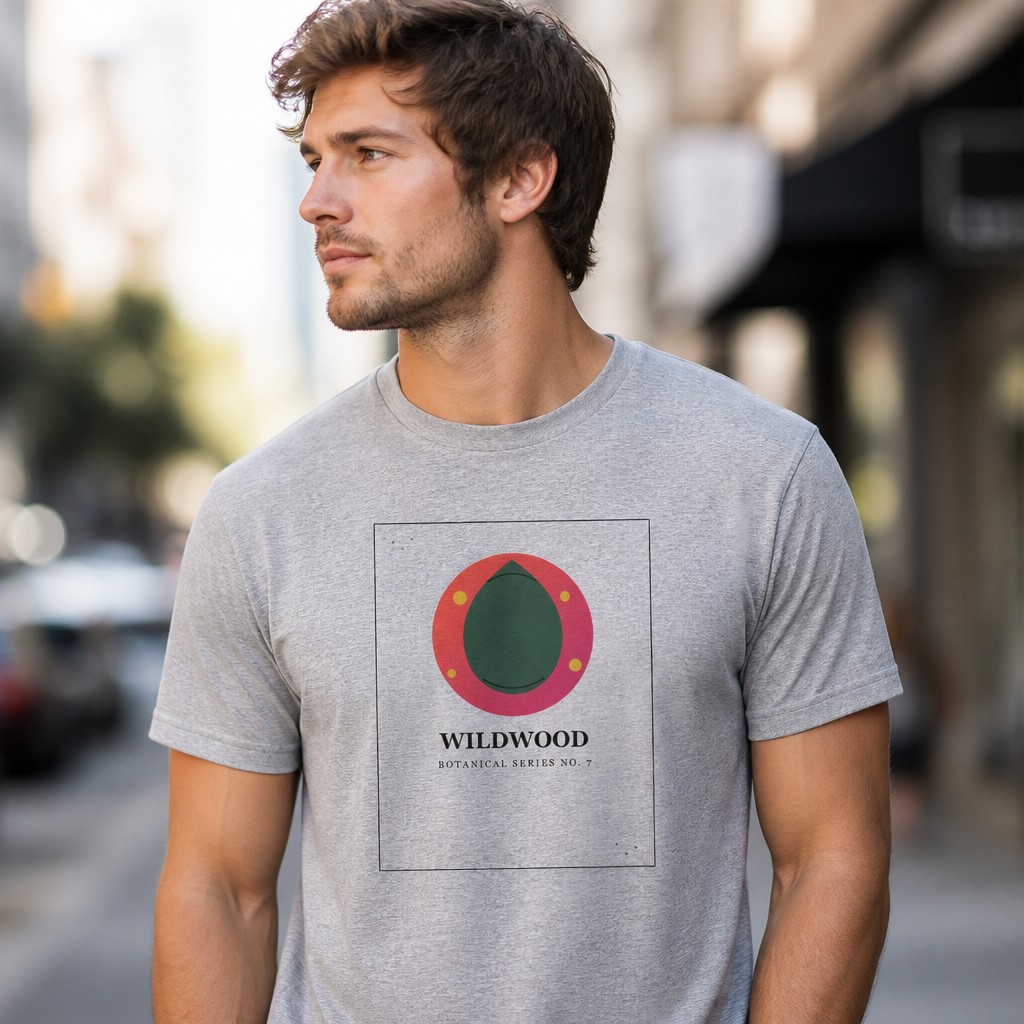
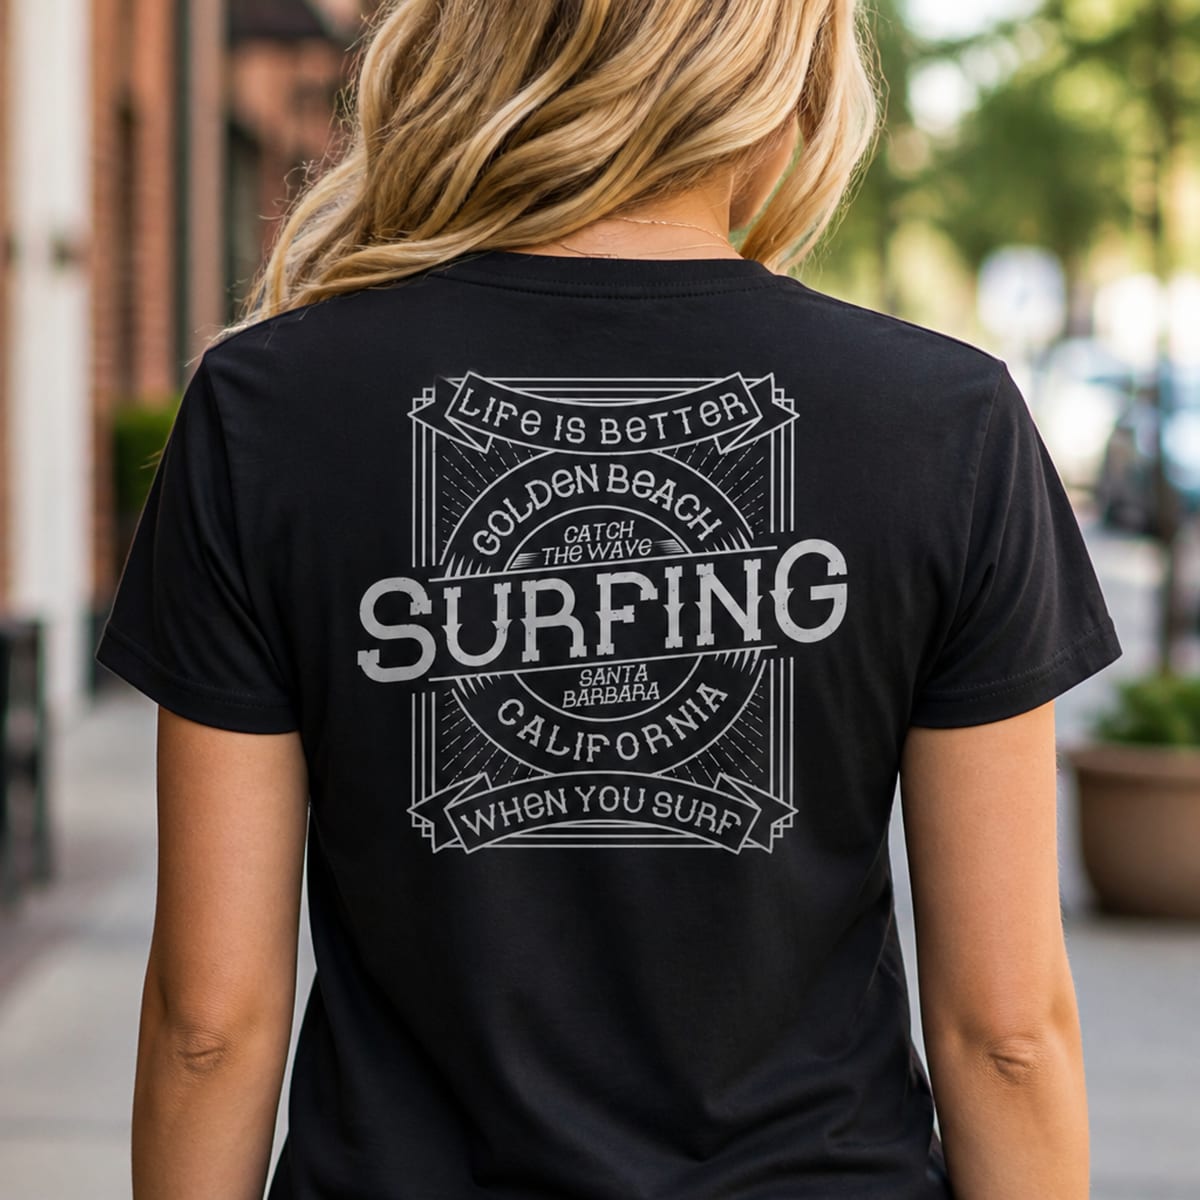
Front placement (left) is free on every plan. Back placement (right) is a Pro feature — same 5 credits per generation.
How it actually works
This isn't one click that produces a matching pair — it's honest about how AI generation works: each mockup is its own generation. To get a front shot and a back shot, you generate twice: once with Side set to Front (using your front artwork), and once with Side set to Back (using your back artwork). Each generation is 5 credits, same as any other mockup.
What changes between the two isn't just which file you uploaded — the AI actually repositions the print. Front placement centers your design on the chest at a natural ~25cm print width. Back placement centers it between the shoulder blades at a slightly larger ~28cm width, matching how back prints are actually sized in real apparel. For the Worn scene specifically, switching to Back also turns the model around so you're looking at their back, not a flipped front shot.
For a matching pair: keep Scene, Color, Model, and Setting identical between your front and back generations. The two images won't be pixel-identical — each is an independent AI render — but matching those four settings gets you a visually consistent pair: same shirt color, same lighting style, same studio or street setting, so they read as one product photoshoot rather than two unrelated images.
Step-by-step: a matching front and back mockup
Switch to T-Shirt mode and set your scene
At postermockai.com/app.html, pick T-Shirt, then choose a scene, color, model, and setting — these are what you'll keep the same for both shots.
Upload your front design and generate
Side defaults to Front. Upload your chest-print artwork and generate as normal — this step works on any plan, including guest.
Switch Side to Back (Pro)
Sign in with a Pro plan, toggle Side to Back, and upload your back-of-shirt artwork. Leave Scene, Color, Model, and Setting untouched from step 1.
Generate the back shot
Same 5 credits, same ~20–30 seconds. You now have a matching front-and-back pair for your listing.
Download both
2000×2000px at 300 DPI each — upload both as separate photos on the same Etsy or Redbubble listing.
5 shirt colors, not 3
Alongside the Side toggle, the color lineup grew from three to five: Heather Grey and White are free; Black, Navy, and Red are Pro. Every color works with both Front and Back placement.
Why this matters for conversion
A listing photo set that only shows the front leaves buyers guessing about the back — and for designs where the back is the point (a large graphic, a back-only print, a "turn around" reveal), a front-only mockup actively undersells the product. Etsy shoppers comparing multiple similar shirt listings are more likely to trust and click through to one that shows both sides; it reads as a more complete, more professional listing than a single-angle product photo.
Show both sides of your design
Upload your front and back artwork and get a matching pair of listing-ready mockups.
Try the T-Shirt tool →2000×2000 · 300 DPI · Front free · Back is Pro
Frequently asked questions
Do I need two separate design files for front and back?
You upload whatever you want printed on that side — if your front and back use different artwork, upload the front file first, generate, then switch Side to Back and upload the back file for a second generation. If the same design should appear on both, you can reuse the same file for both generations.
Will the model and shirt look identical in both shots?
Each generation is created independently, so the two images won't be pixel-identical, but keeping Scene, Color, Model, and Setting the same across both generations gets you a closely matching pair — same shirt color, same studio or street setting, same styling.
Is back-of-shirt printing a Pro-only feature?
Yes. Front printing is free on every plan; the Back option requires a signed-in Pro account. Each generation, front or back, costs 5 credits.
Can I use this for hoodies or long sleeves, not just t-shirts?
The T-Shirt tool is built and tested for crewneck t-shirt mockups specifically. Placement and fabric behavior are tuned for that garment type.